Creating & Importing Hytale Custom Textures
This comprehensive guide features two parts: first, how to generate and preview custom textures using VoxAI and Blockbench, and second, how to import those textures into Hytale using the in-game Asset Editor.
Part 1: Generating & Previewing Textures
1. Generating Textures with VoxAI
- Go to voxelai.ai/hytale.
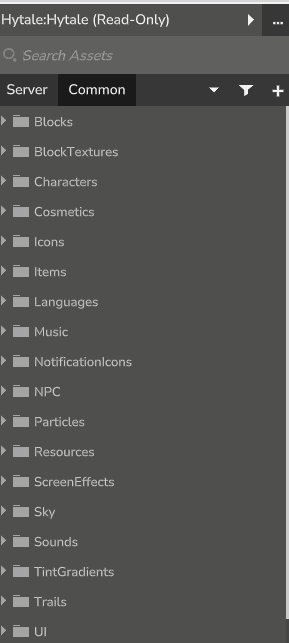
- Select a base asset. The asset selection mimics the folder hierarchy of the Hytale default pack, which you can find in the Hytale built-in Asset Editor.

- Enter your prompt. Describe what you want your texture to look like. You don't need to mention the item nature or format—just focus on the aesthetic.

- Once your texture has generated, it will appear in your textures collection. Press the download button.

- Unzip the downloaded folder. You will find two files: one with a black background and one with a transparent background.

- Use the transparent background one to apply your texture to the model in Blockbench or Hytale. The original is provided in case you need to edit the background manually.
2. Previewing in Blockbench (Optional)
If you want to view your new texture on the 3D model before importing it into the game, follow these steps. Otherwise, skip to Part 2.
- Open Blockbench and install the Hytale plugin. Go to File > Plugins.

- Search for Hytale and click install.

- Back on the main page, click on Hytale Prop under the new Hytale section in the left menu.
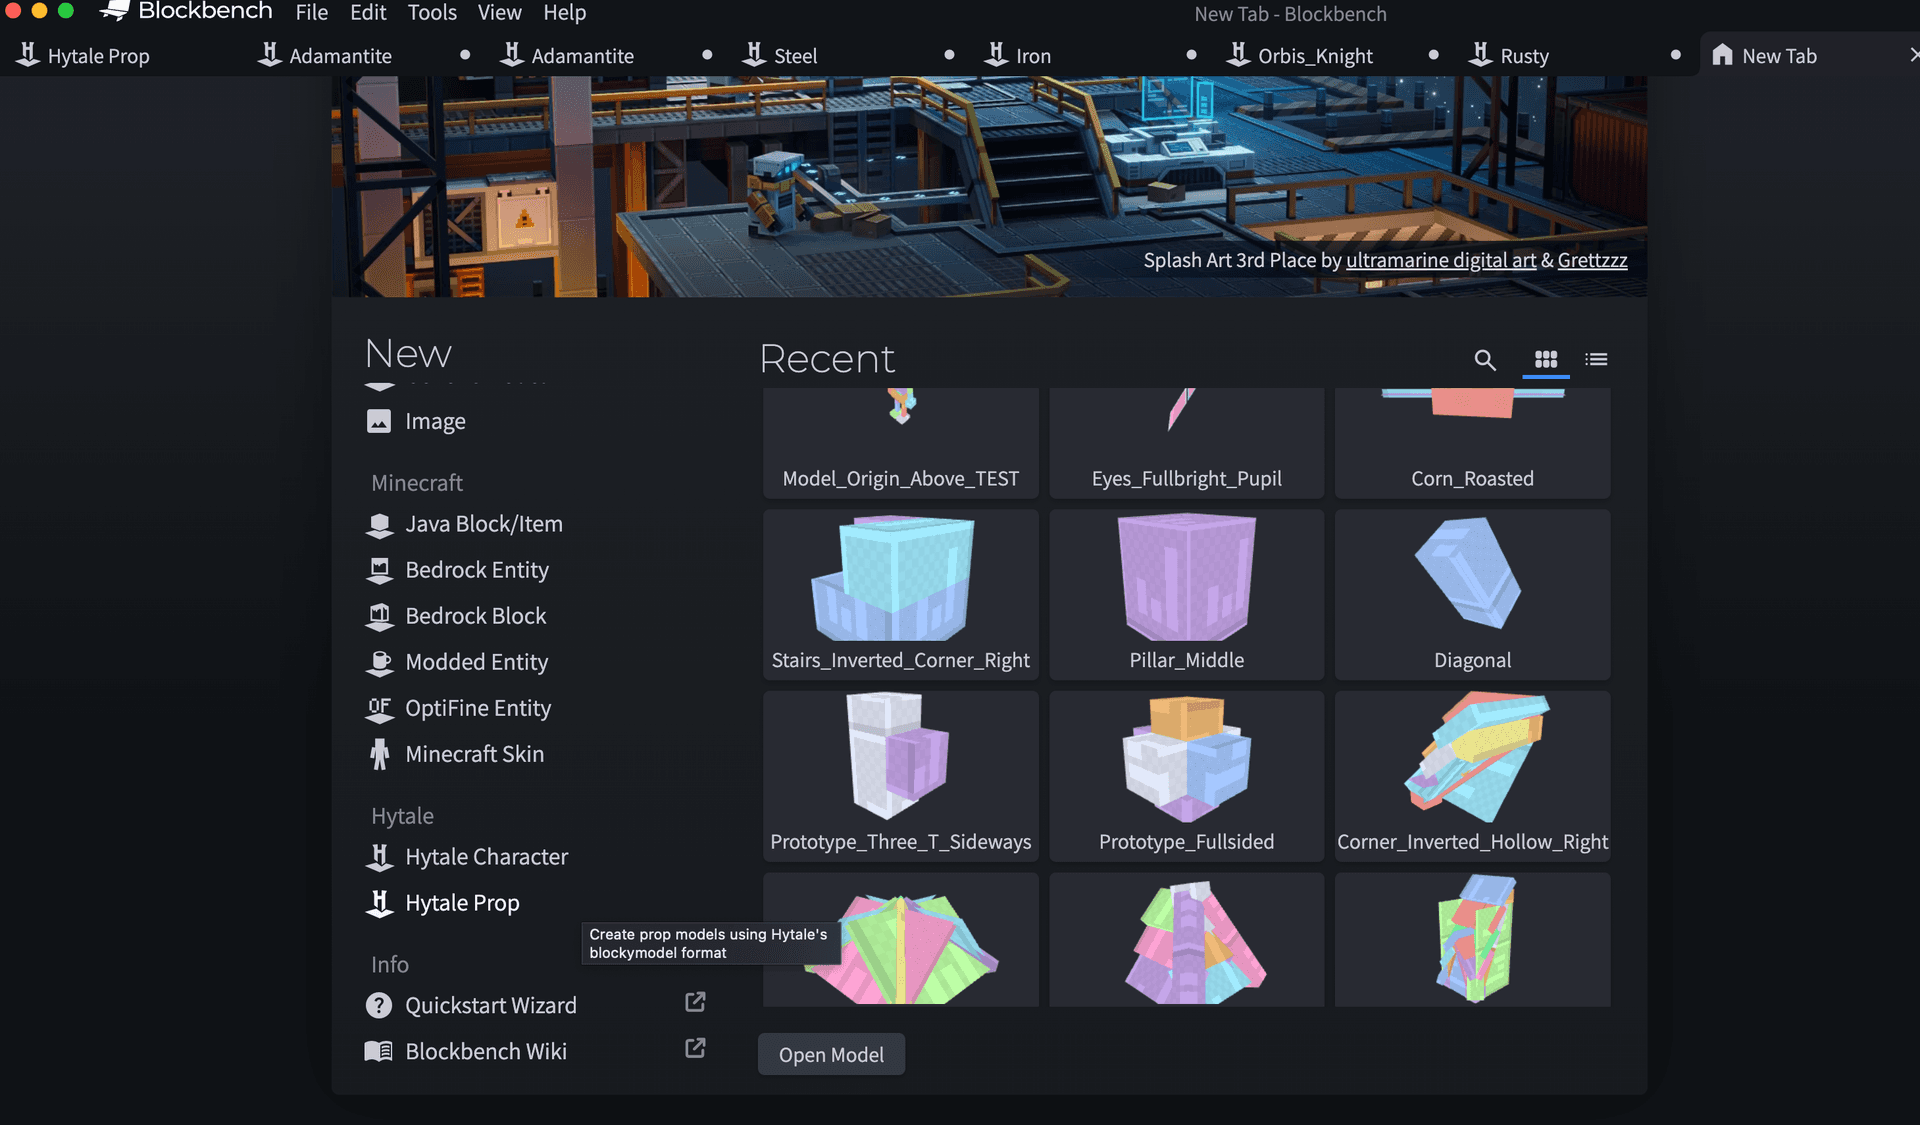
- Click on Create new model.

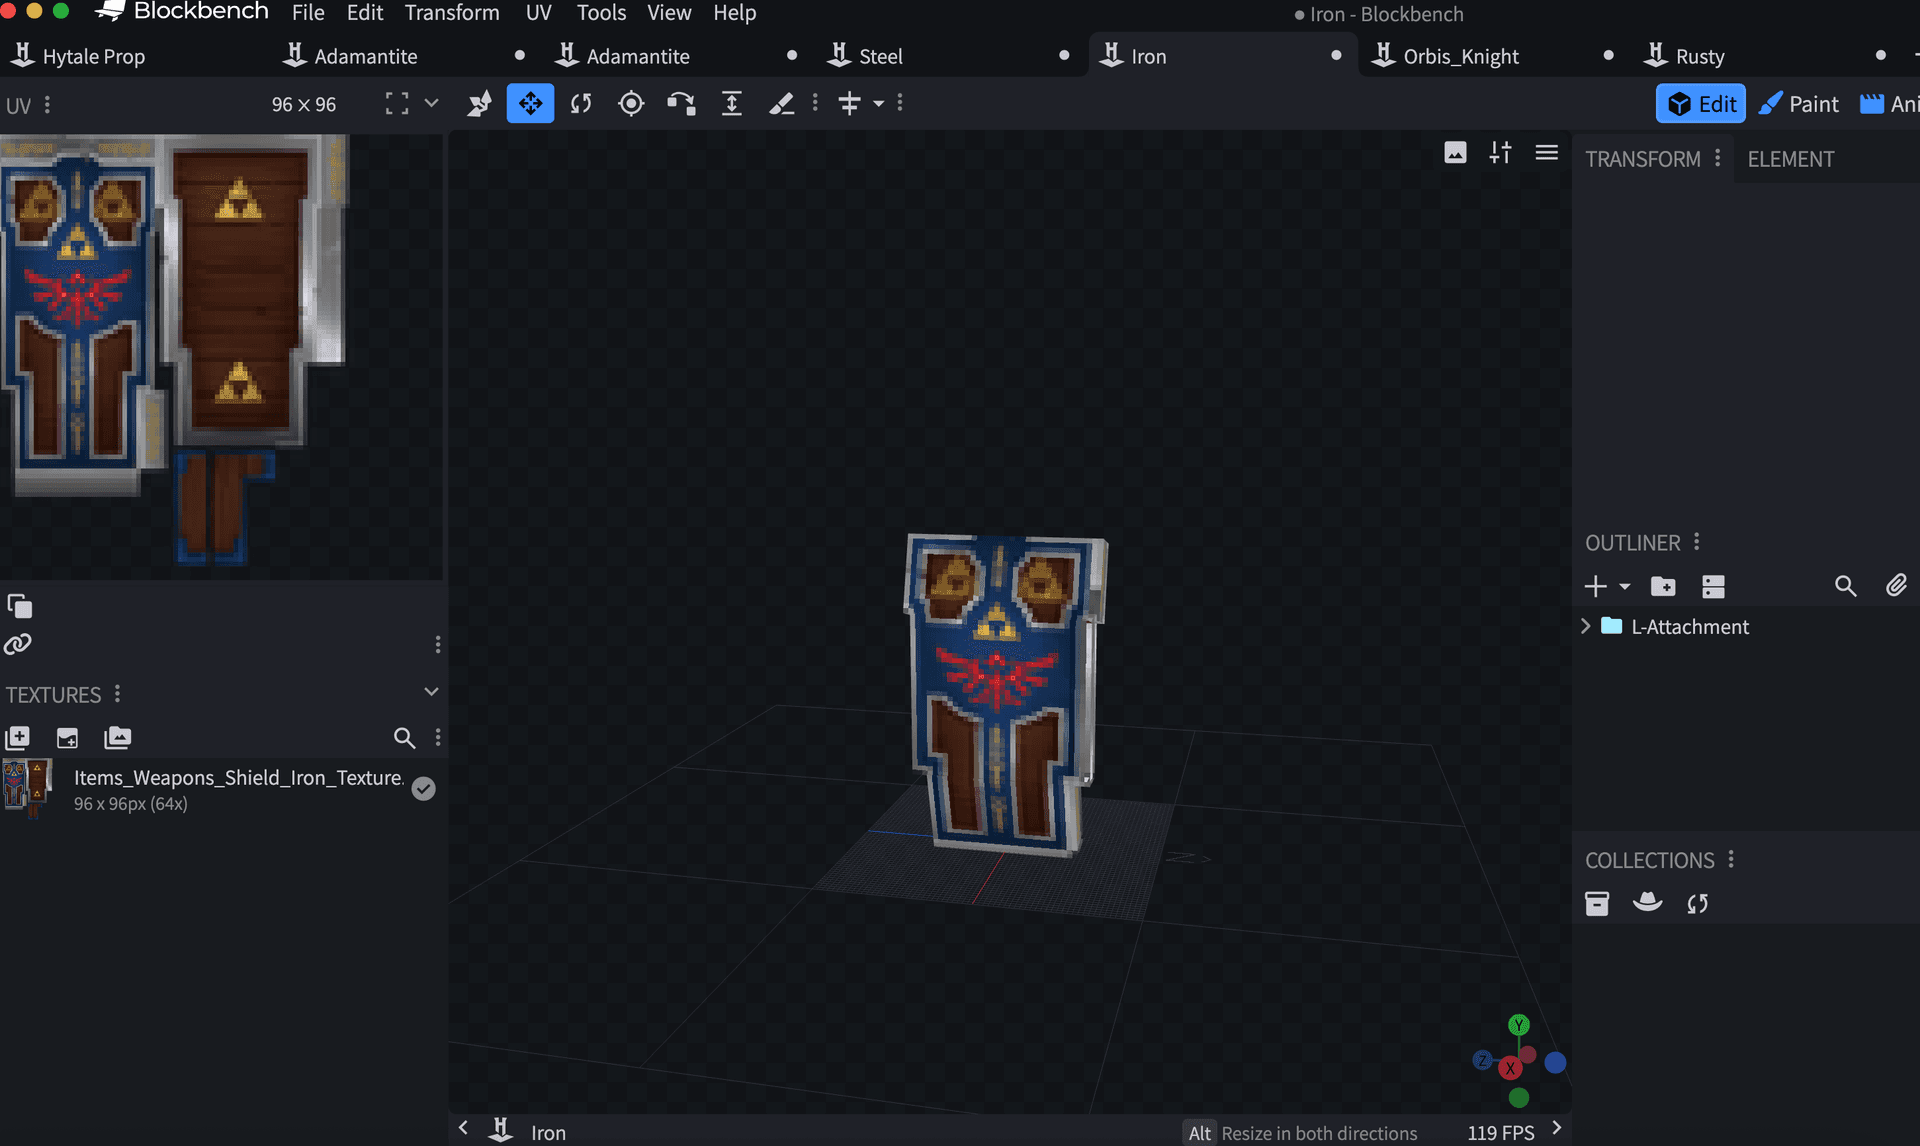
- Drag and drop the
.blockymodelfile of the asset you want to modify. You can find this in the game's source files by unzippingAsset.zip. - Drag and drop your custom texture (transparent version) made with VoxAI and click Import.

- Voila! You should now see your model with your new custom texture applied.
Part 2: Importing into Hytale
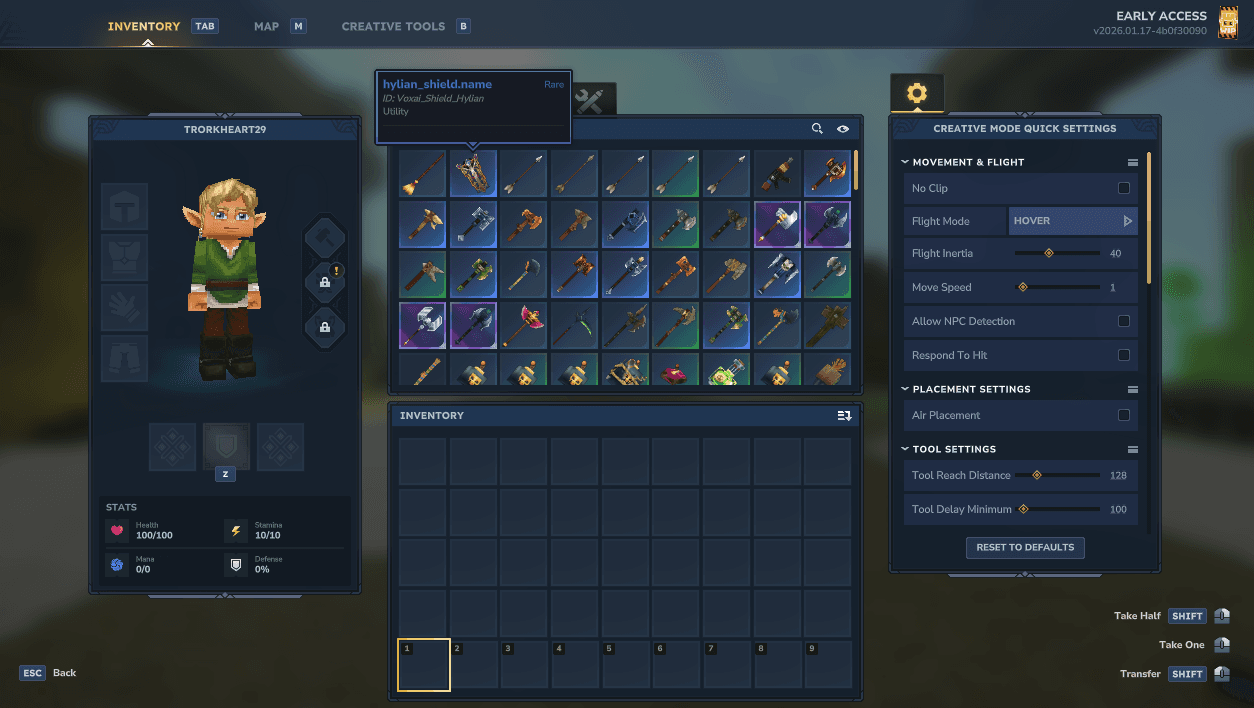
1. Accessing the Asset Editor
Start by entering a Creative World with operator permissions.
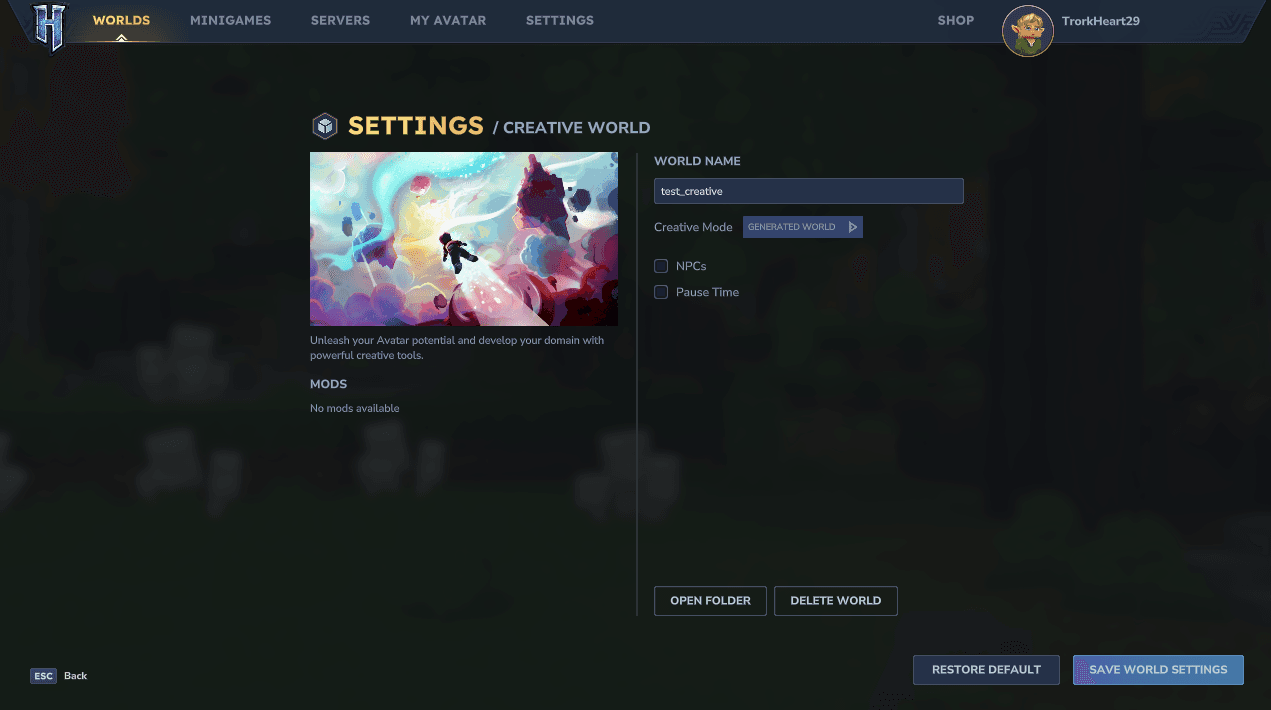
- Go to Creative World.

- Select or create a new world.

- Create the new world.


- Open the command line (press
/) and type/op selfto grant yourself operator privileges.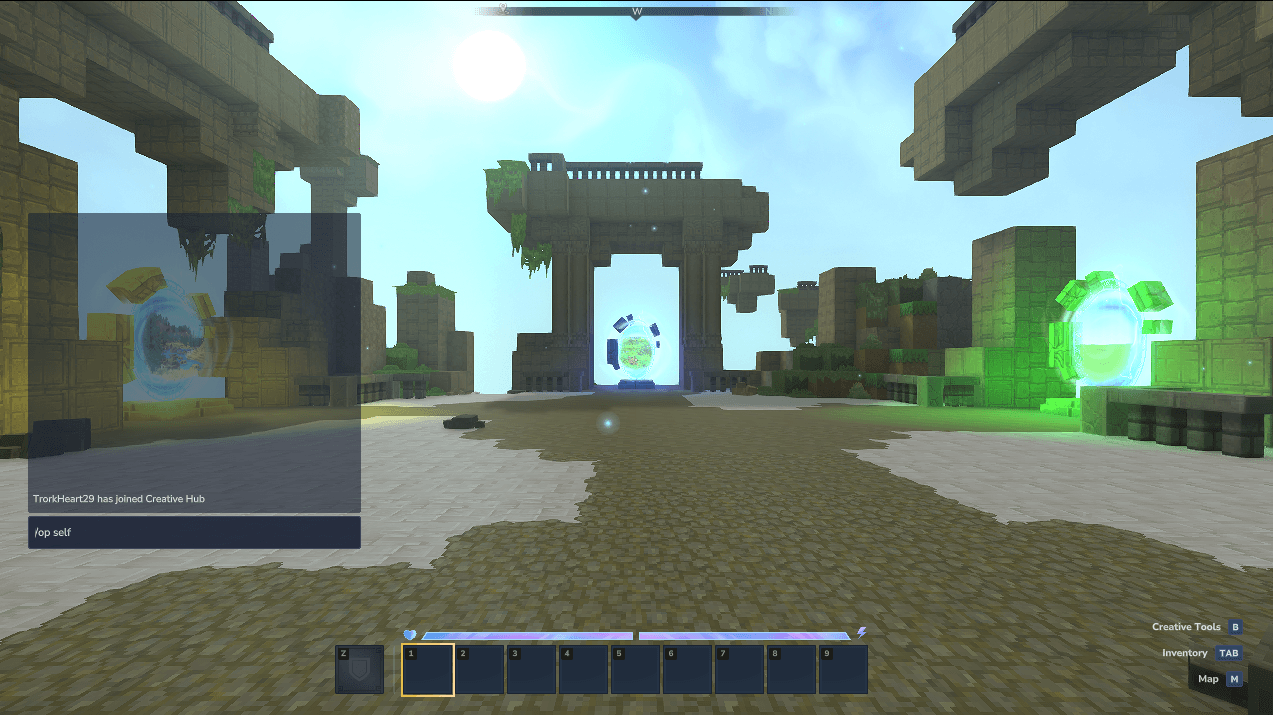
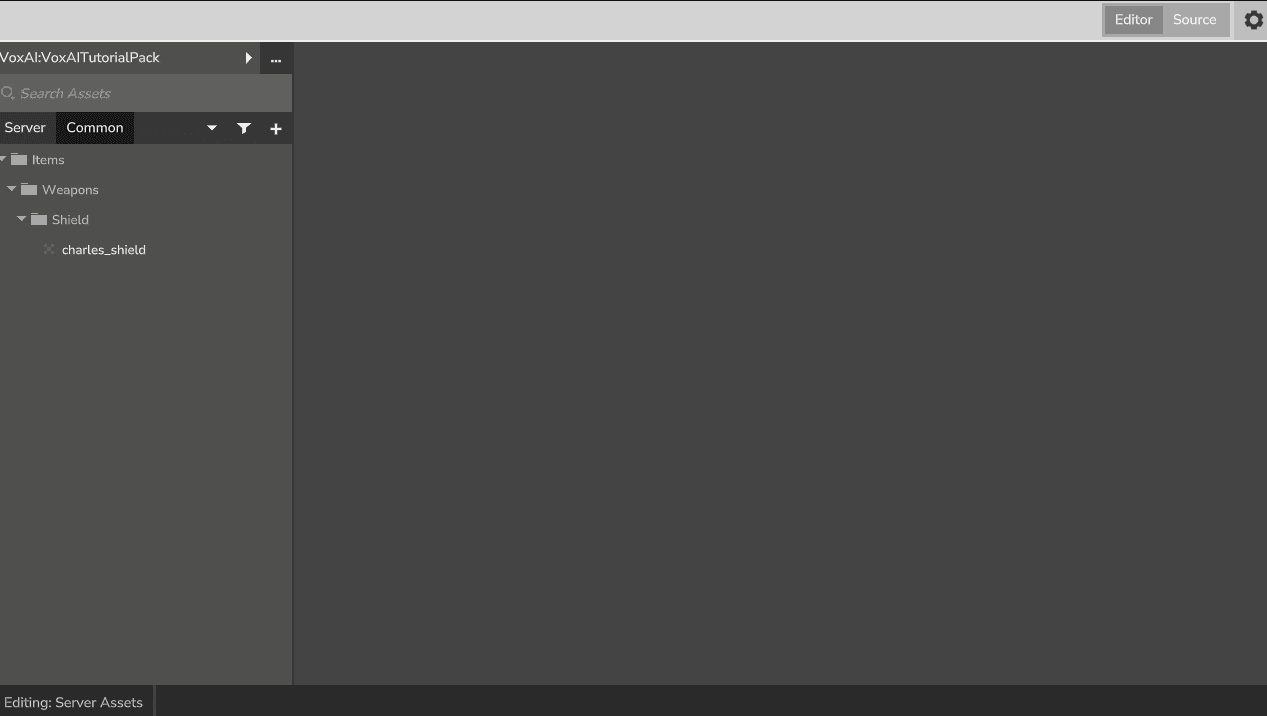
- Navigate to Inventory > Creative Tools > Assets > Asset Editor.

- This will launch a dedicated window for the Asset Editor, You can see the same file structure as what you have in VoxAI when searching for a base asset.
2. Creating a Custom Resource Pack
- Click the three dots on the top right side of the left column and select Add Pack.

- Fill in the Pack Name, Group Description, and Author. Click Save.


- You have now created a custom pack available in your selected world.
3. Adding Texture Files
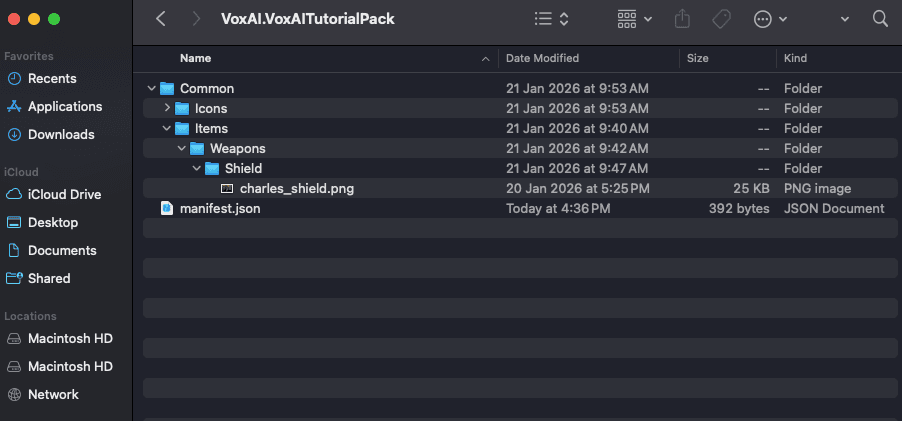
Now, we need to place your VoxAI texture file into the correct folder structure on your computer.
- Return to the world selection screen and click the Open Folder button for your world.
- Navigate to the Mods folder. You will see a folder for the pack you just created.


- Crucial Step: You must replicate the Hytale folder structure to place your texture where the base asset is located.
How to find the correct path:
- Check the base asset location in the Asset Editor.
- Or unzip
Asset.zipin your Hytale game files to verify the hierarchy.
4. Configuring the Asset
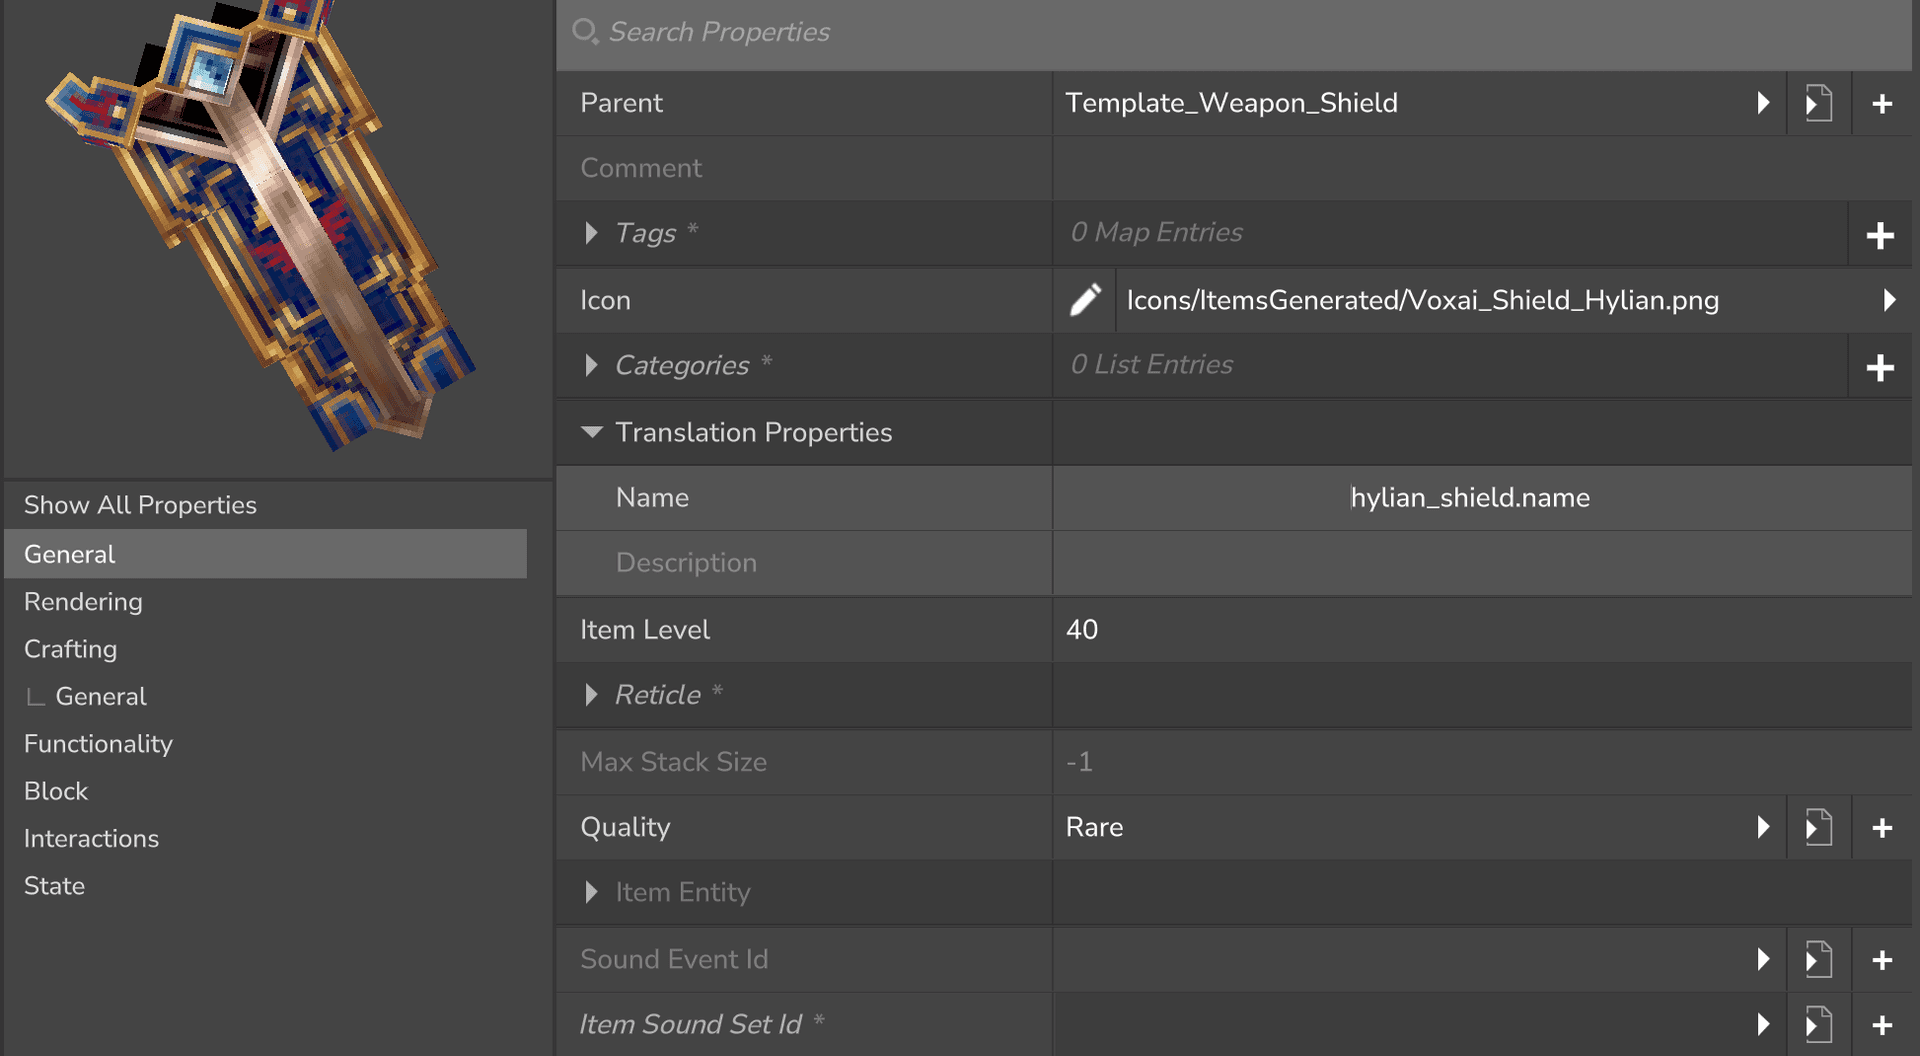
Go back to the Asset Editor to link your texture.
- Select your Custom Pack from the dropdown menu at the top left.
- Create a new asset (e.g. Item) and use the Copy Asset feature. Select the Hytale pack and search for the base asset you want to use (e.g.,
Weapon_Shield_Adamantite).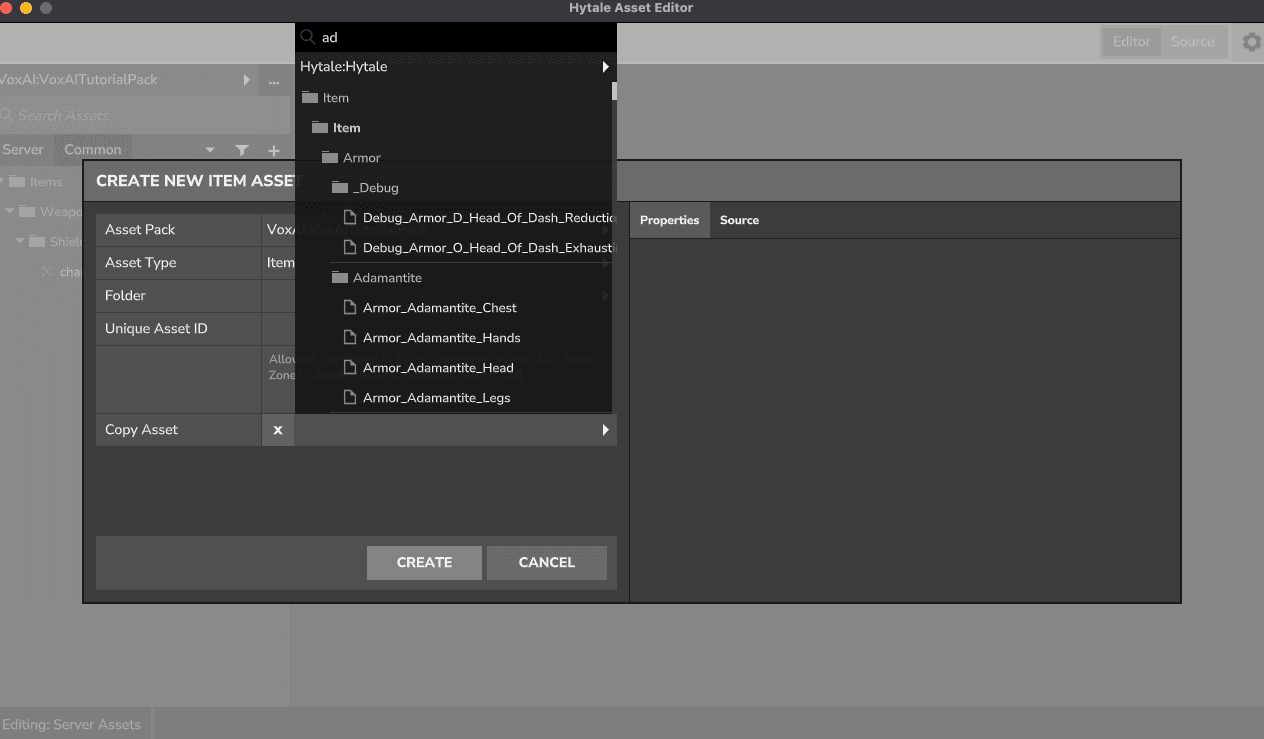

- Give your asset a Unique Asset ID (e.g.,
Voxai_Shield_Hylian). Note: Ensure proper capitalization (e.g., after underscores). Click Create.
5. Finalizing & Testing
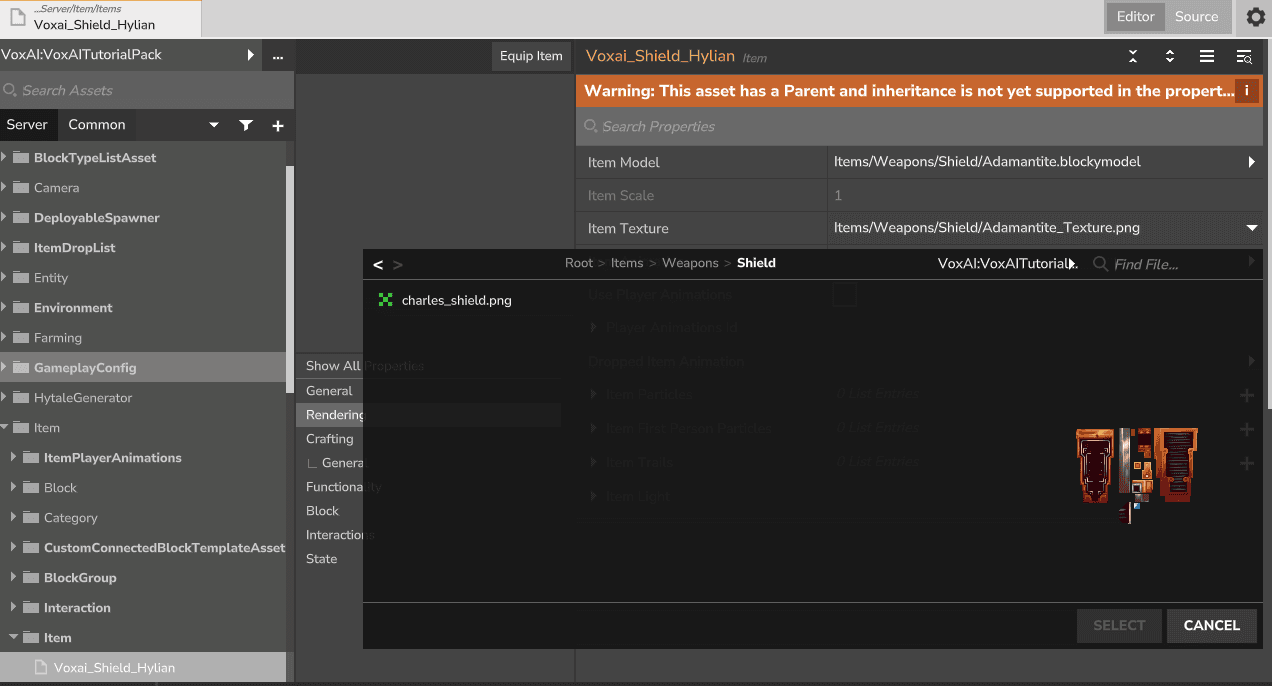
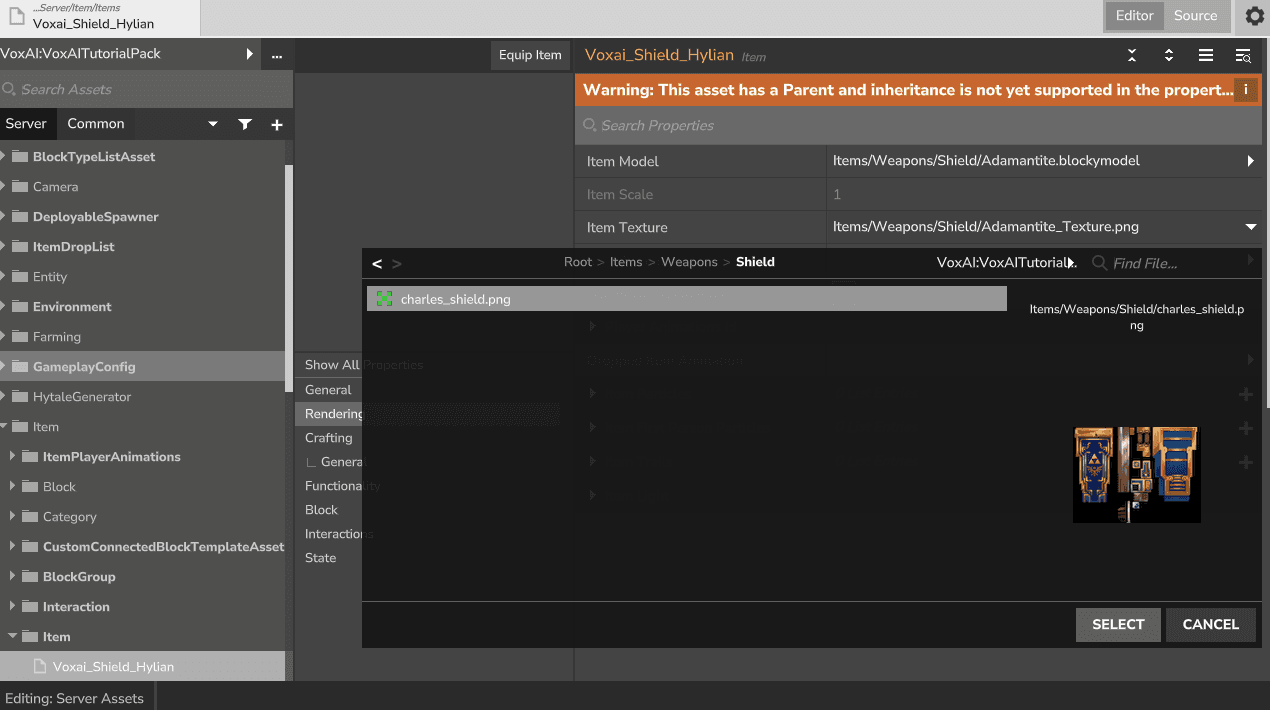
- Change Texture: Go to Rendering > Item Texture. Select your resource pack and choose the custom texture you added.
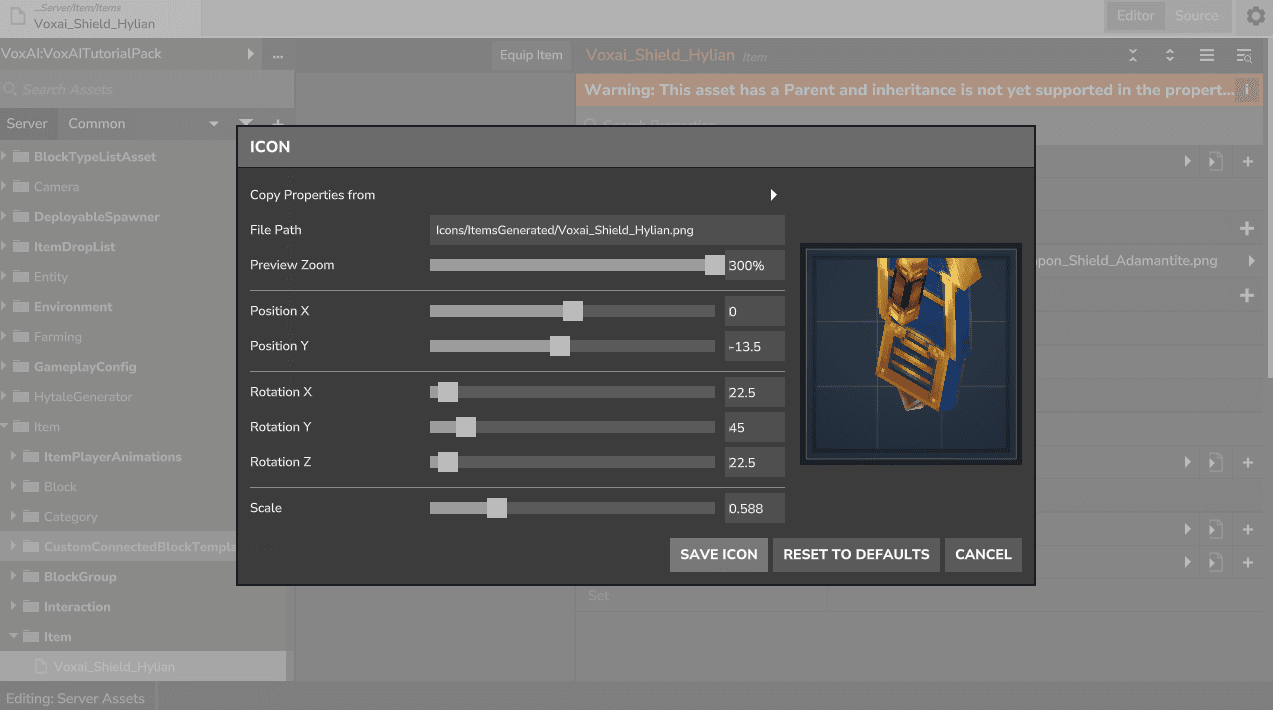
- Create Icon: Go to General, click the Pen icon next to "Icon". Adjust the position and save.

- Edit Properties: Update the Name and Description in the Translation properties.
- Test In-Game: Exit the world and re-enter to reload assets. You should now see your custom item in the inventory!