
Getting Started with VoxAI
Welcome to VoxAI! This tutorial will guide you through our onboarding process and show you the optimal workflow for generating 3D voxel art models with AI.
📚 In This Guide
🎬 Prefer Video? Watch the Tutorial
Follow along with our step-by-step video guide, or continue reading below for the full written tutorial.
💡 Pro Tip: While this tutorial follows a linear sequence, once you have full access to the app, you'll be able to perform multiple generations simultaneously, creating several images and 3D models at the same time.
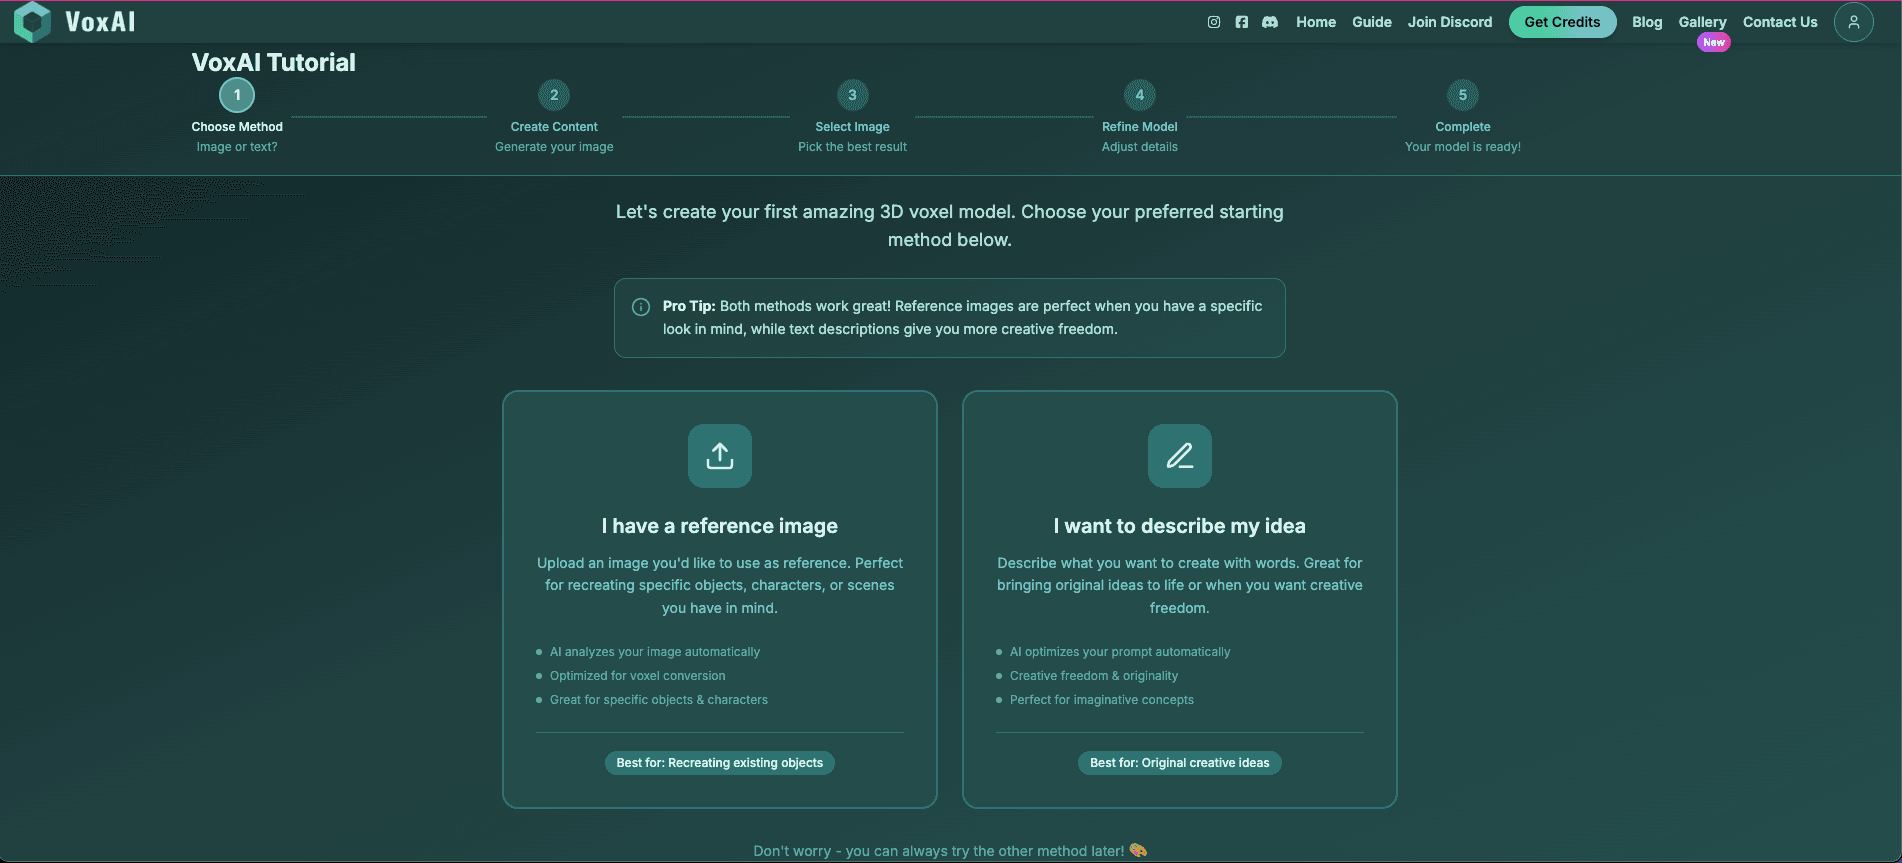
Two Ways to Begin
When you start the tutorial, you'll have two initial options:
Generate from Reference Image
Choose this if you already have a reference image from Google, Pinterest, or other sources.
Generate from Text Prompt
Choose this if you don't have a reference image and want to create a voxel art image from scratch.
We'll cover both workflows below, starting with the reference image method.
Workflow 1: Generating from a Reference Image
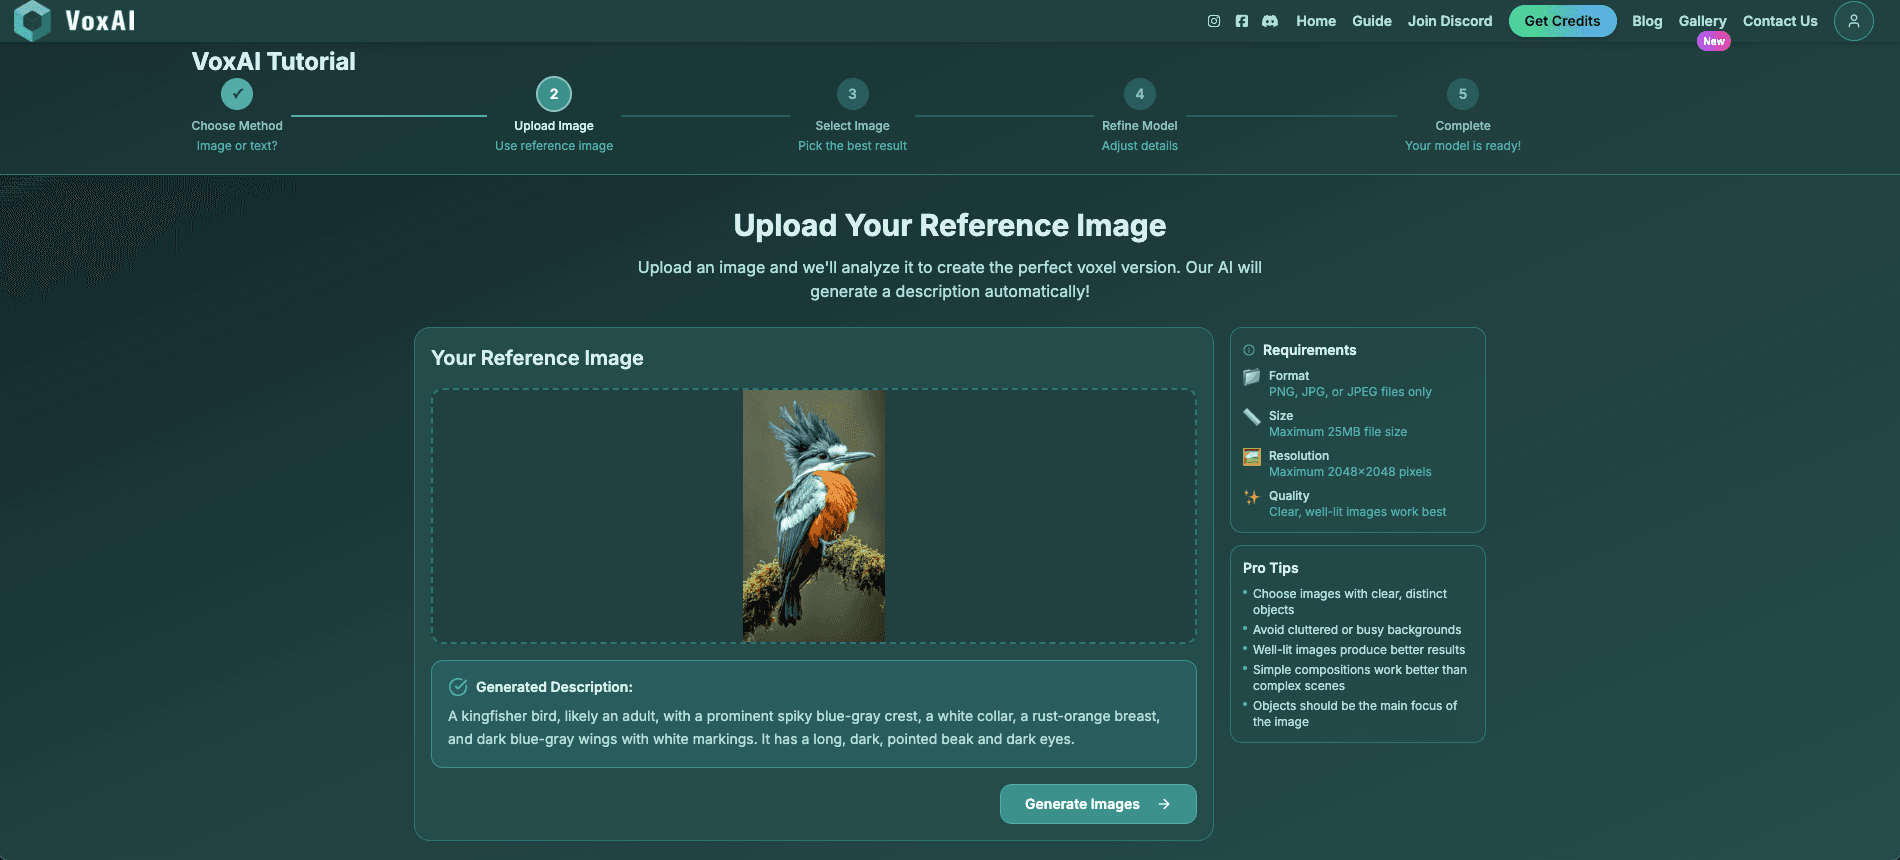
Step 1: Upload Your Reference Image
First, you'll be prompted to enter your reference image. You can source images from platforms like Pinterest or Google. For this example, we'll use an exotic bird found on Pinterest.
When you upload your image, VoxAI automatically analyzes it and generates a description that will be used alongside your image to create a more accurate voxel art version. You can review this description before proceeding.
Step 2: Generate the Voxel Art Image
Once you've confirmed the description, click "Generate the Image." The AI uses both the description and reference image to produce better results. This process typically takes 1-2 minutes.
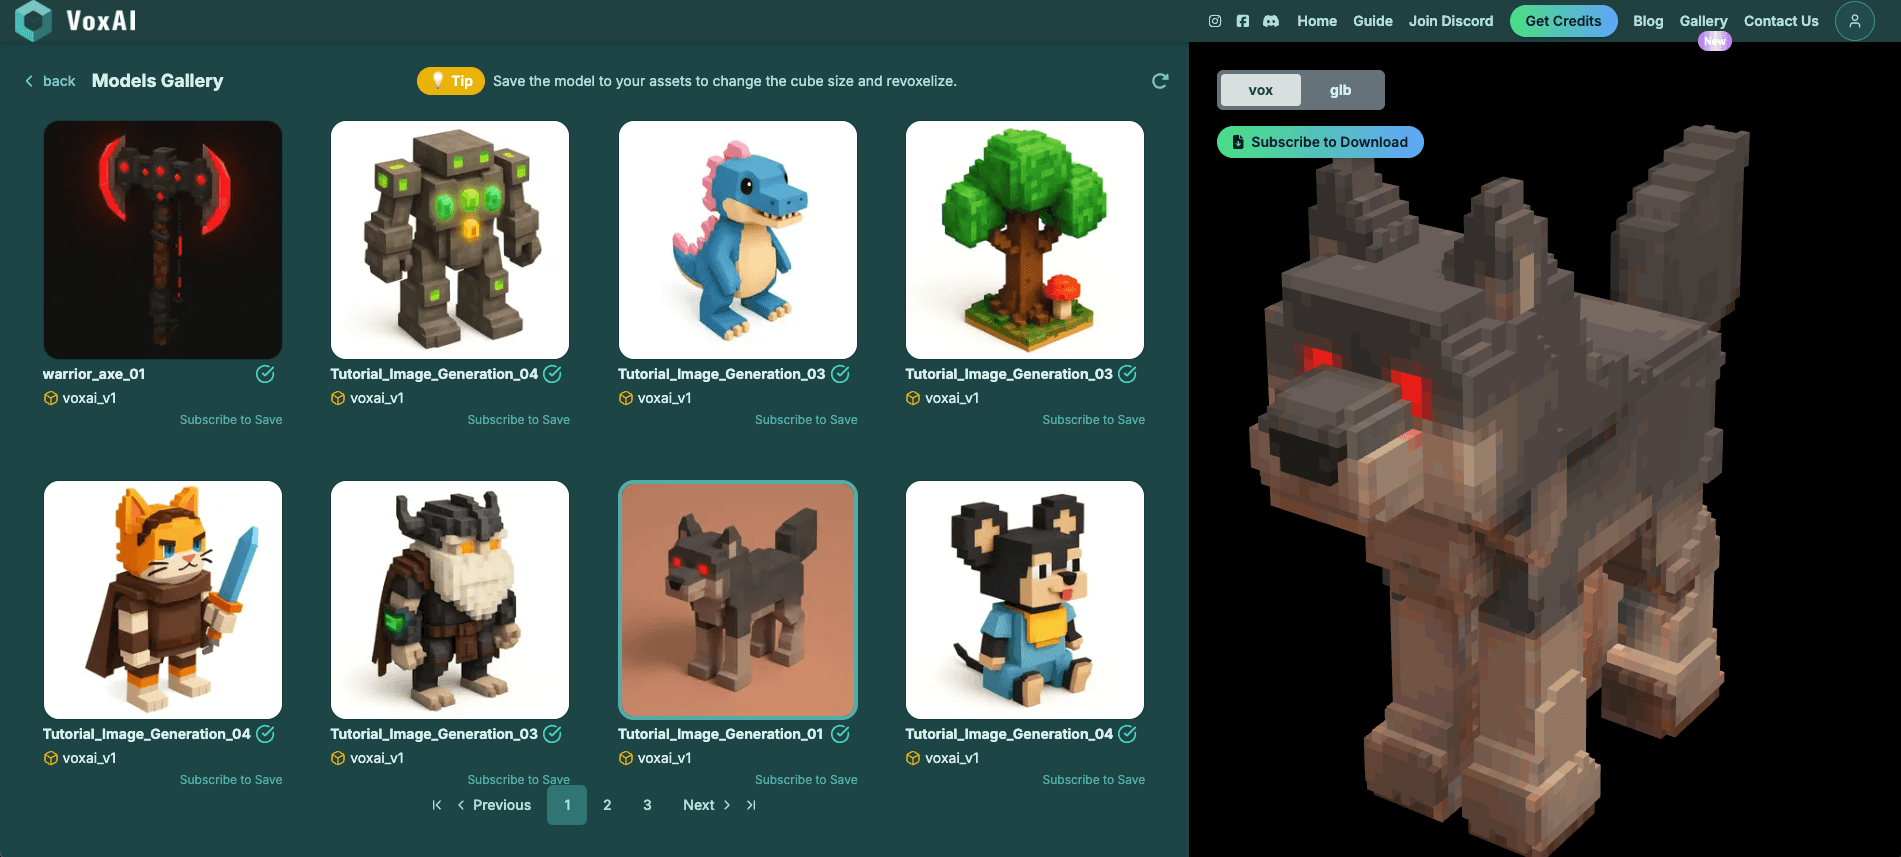
⏳ While You Wait: You can explore the Gallery, which features numerous models available for download or modification. The Gallery is unlimited—you can download hundreds of models. Access requires a subscription, which you can explore by clicking "Get Credits."
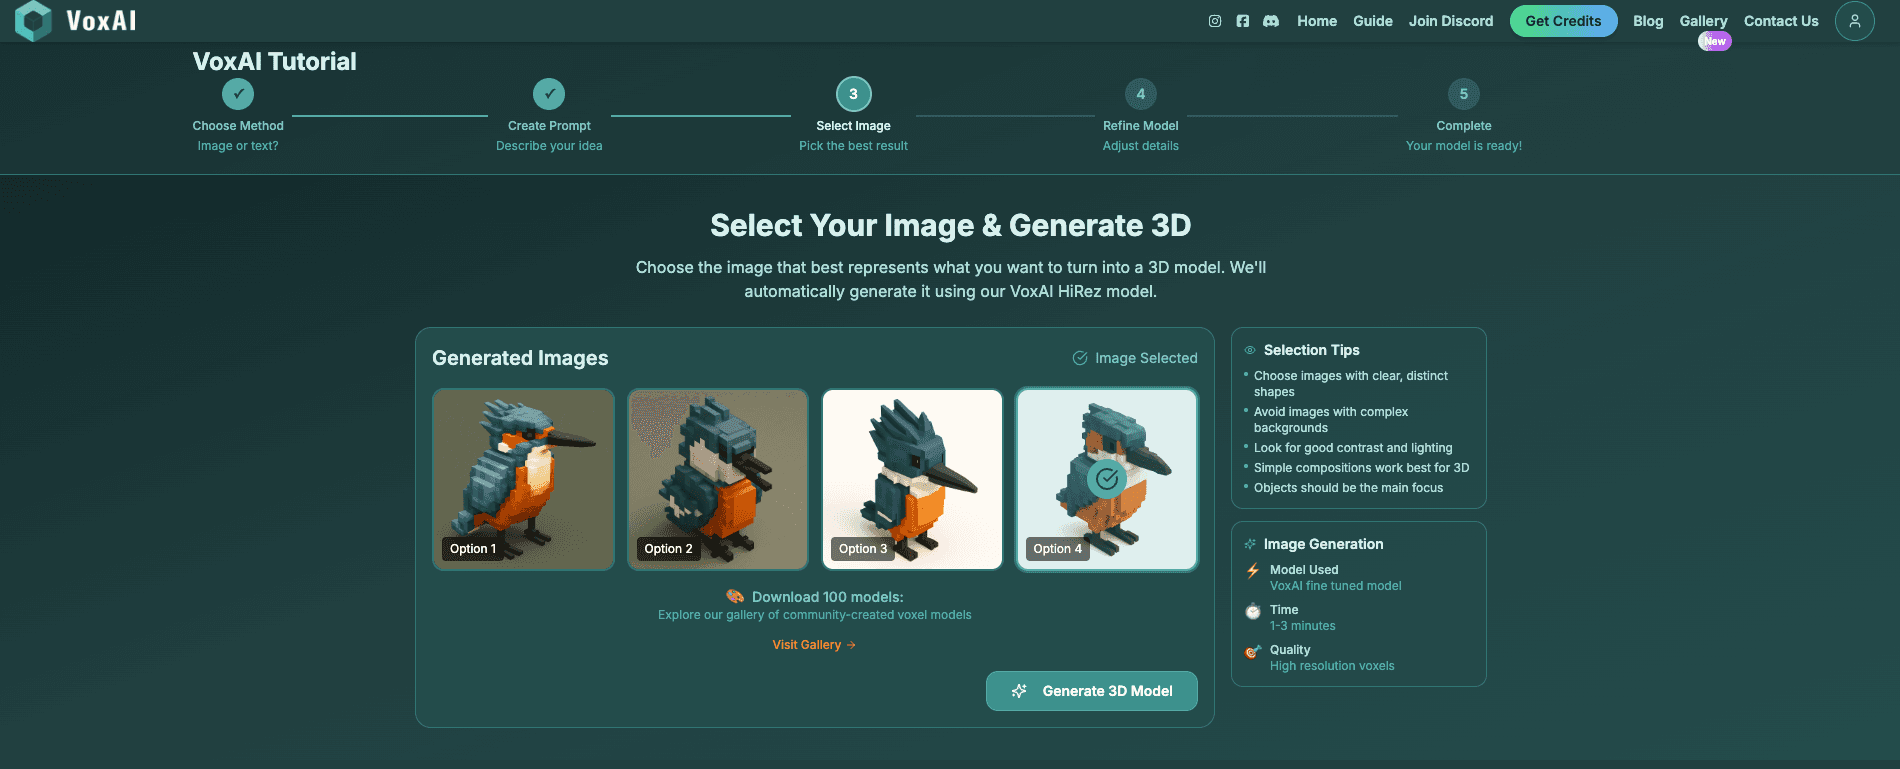
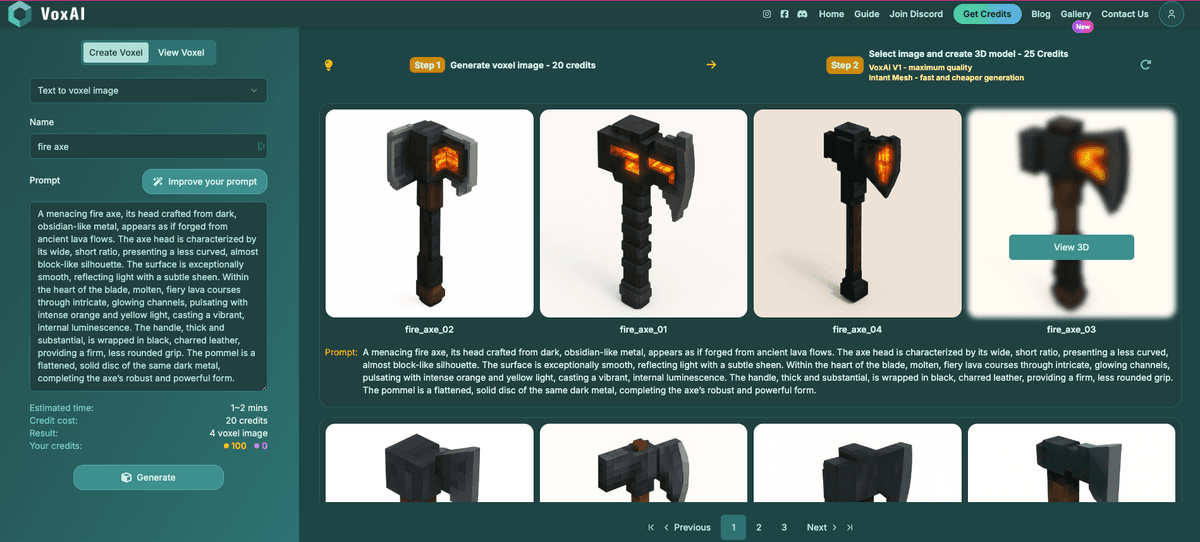
Step 3: Select Your Preferred Variation
VoxAI generates four different options for each image to account for randomness and varying results. Different parameters create various styles and outcomes. Review all options and select the one that works best for your needs.
For the bird example, two options worked well. Choose the one showing less faces with a better potential for 3D generation.
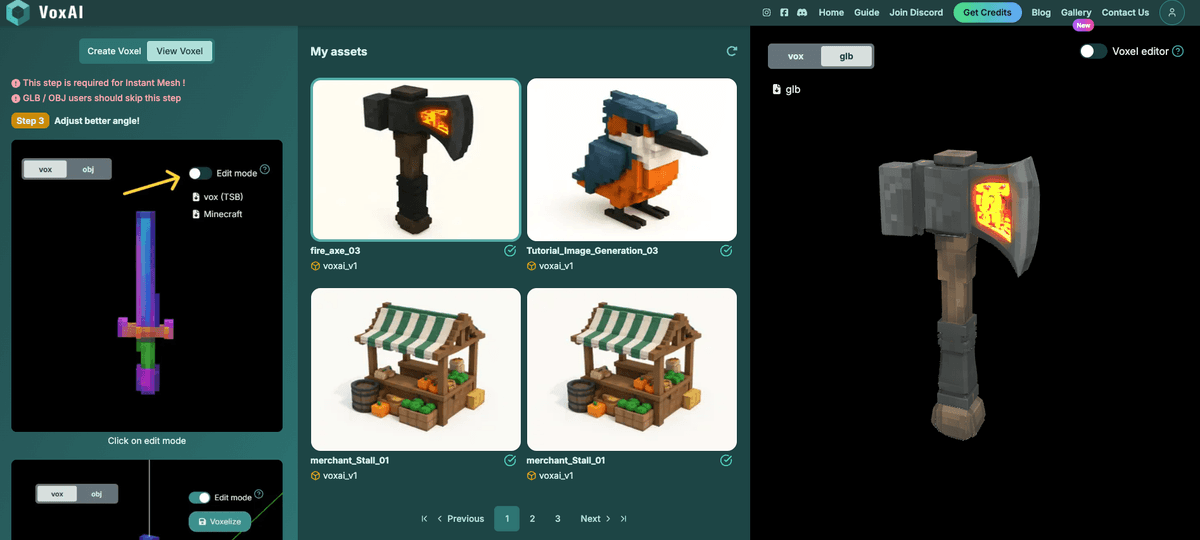
Step 4a: Generate the 3D Voxel Model
After selecting your voxel art image, the next step is generating the 3D voxel model. Using a voxel art image as input yields better 3D results. After completing the tutorial, you can also generate models directly from your own voxel art images using the dedicated Image-to-3D feature.
You can see the rendering of both your .vox and .json files (Vox) and the .glb file (GLB).
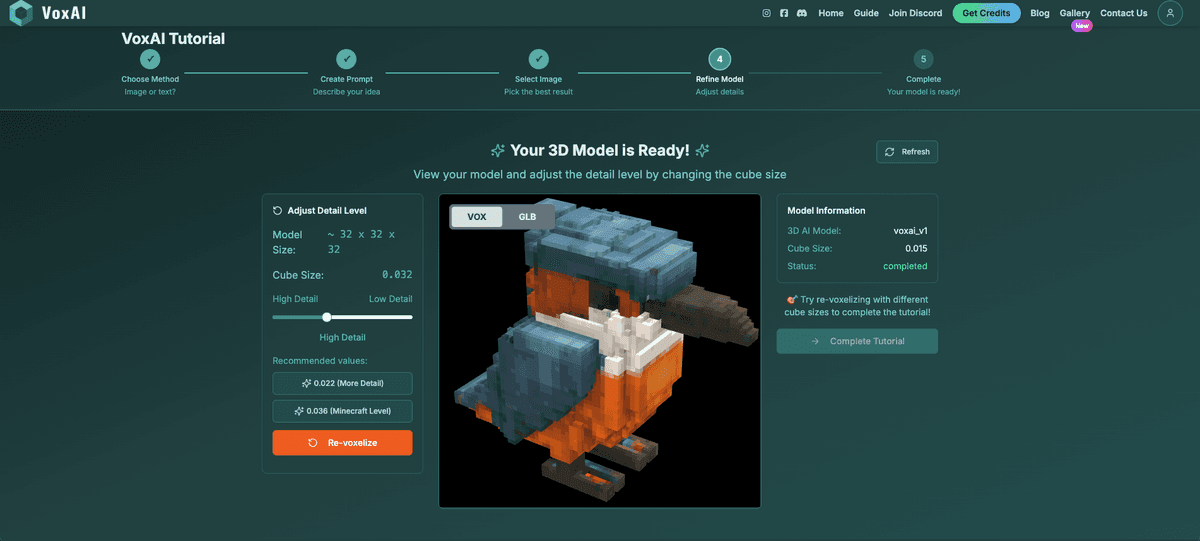
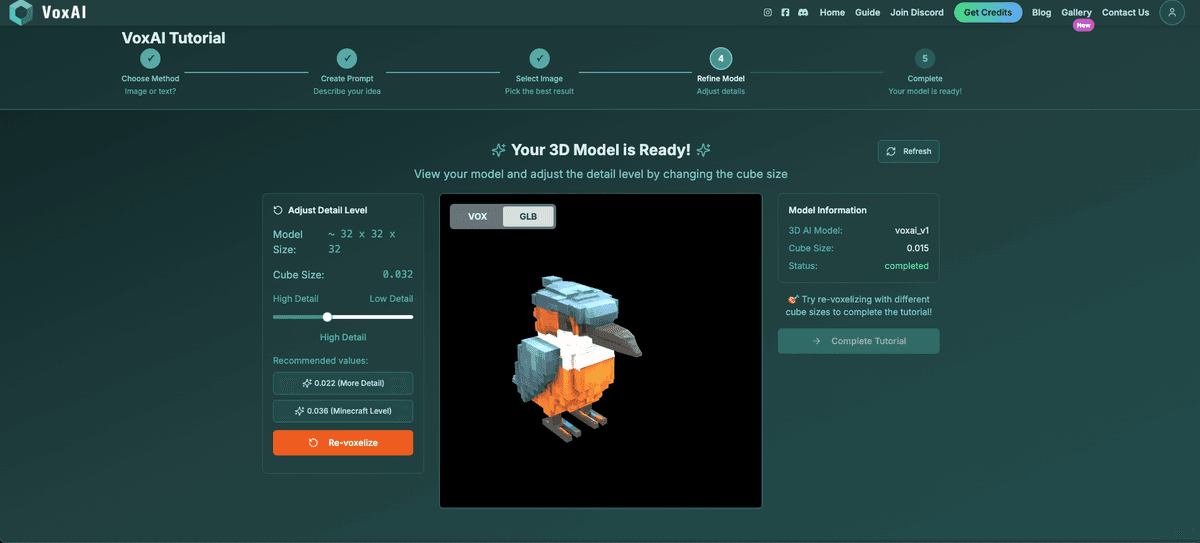
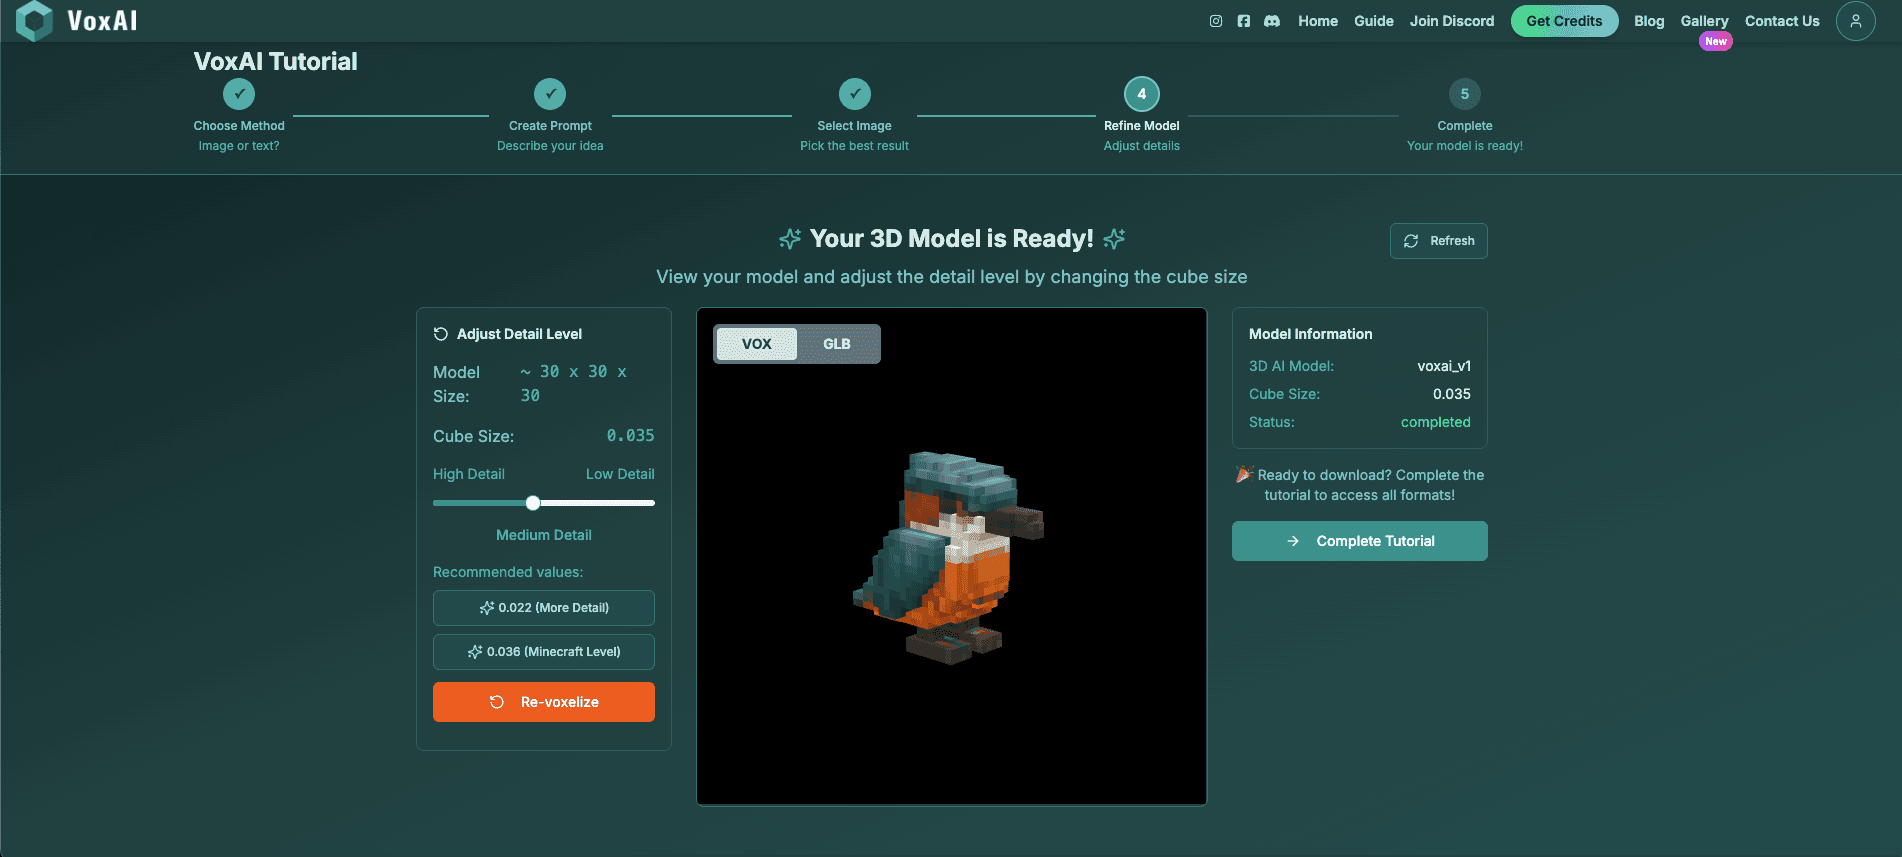
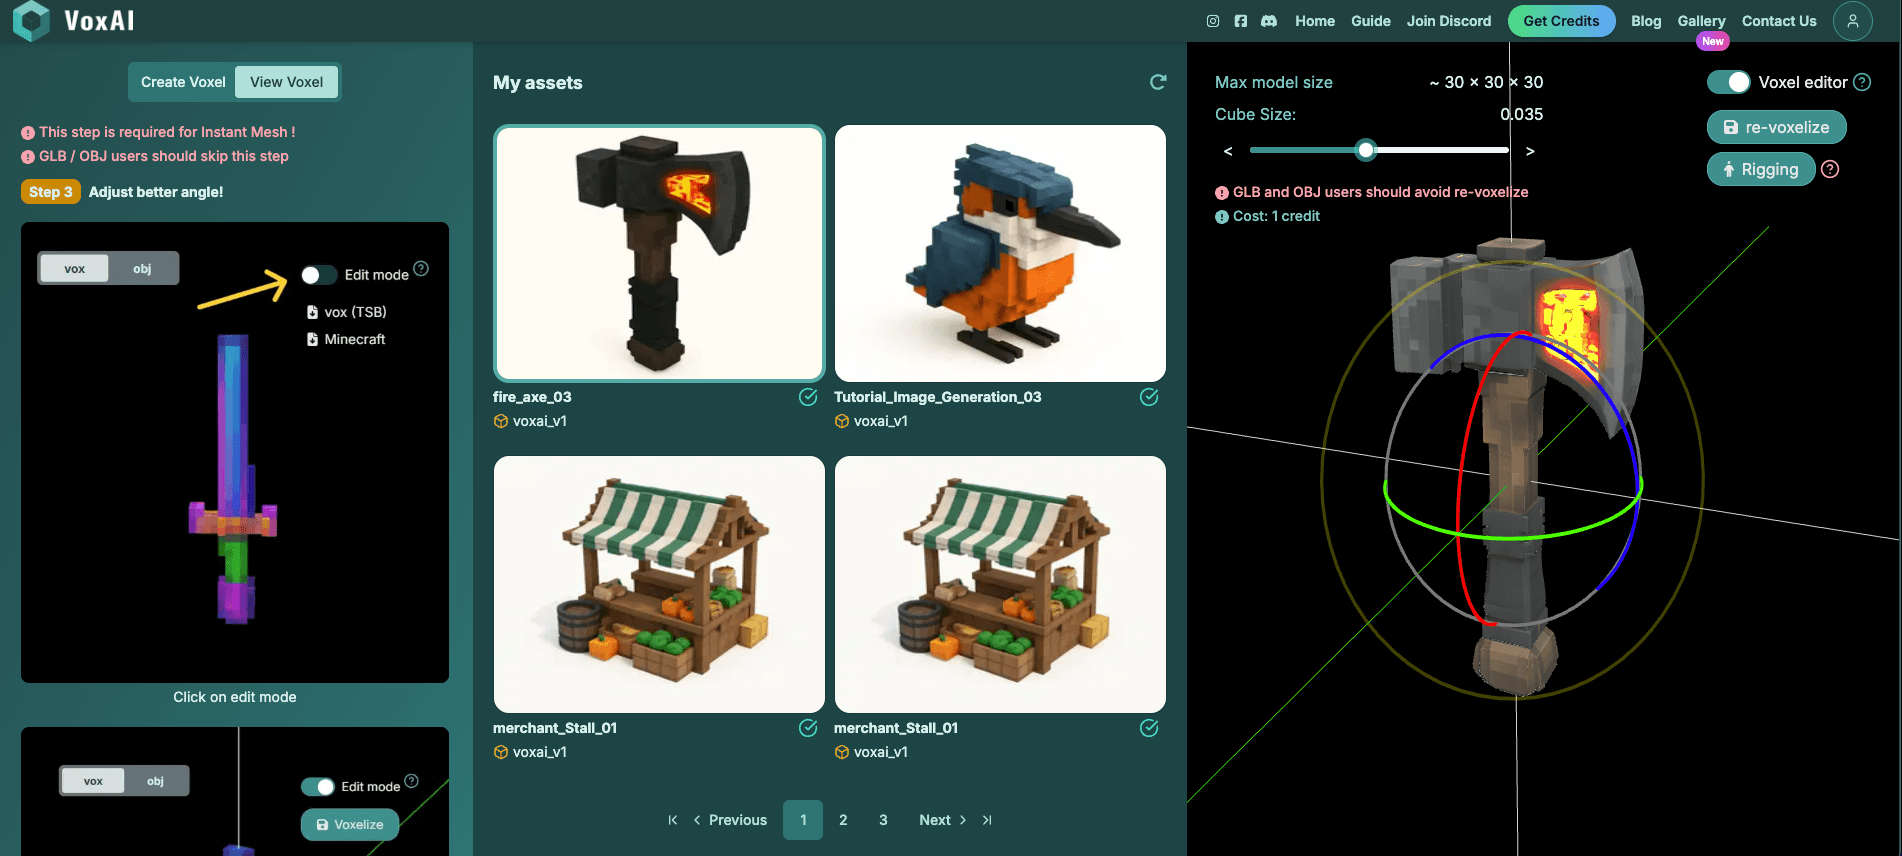
Step 4b: Adjust Level of Detail and Cube Size
With your 3D model generated, you can now adjust the detail level. The maximum level of detail corresponds to the minimum cube size.
⚠️ Important for Minecraft: We recommend using approximately 0.035 - 0.036 cube size for Minecraft models. The relationship is inverse:
- • Smaller cube size = More details
- • Larger cube size = Fewer details
Use the slider or reference points to adjust, then click "Re-voxelize" to apply changes.
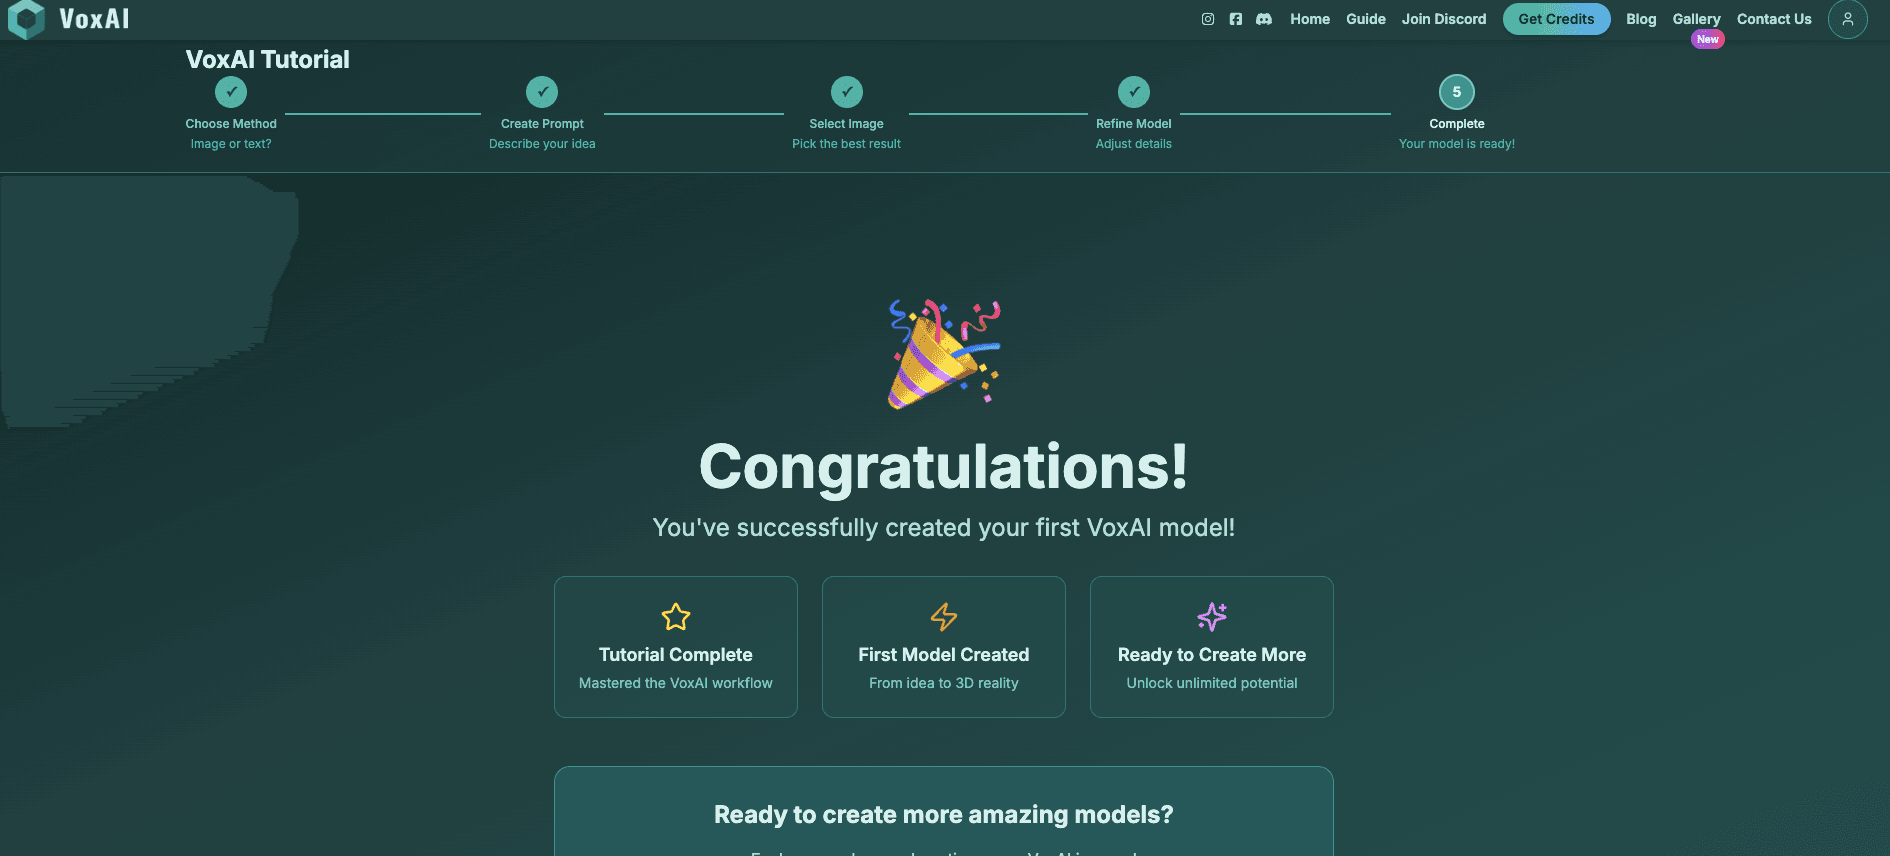
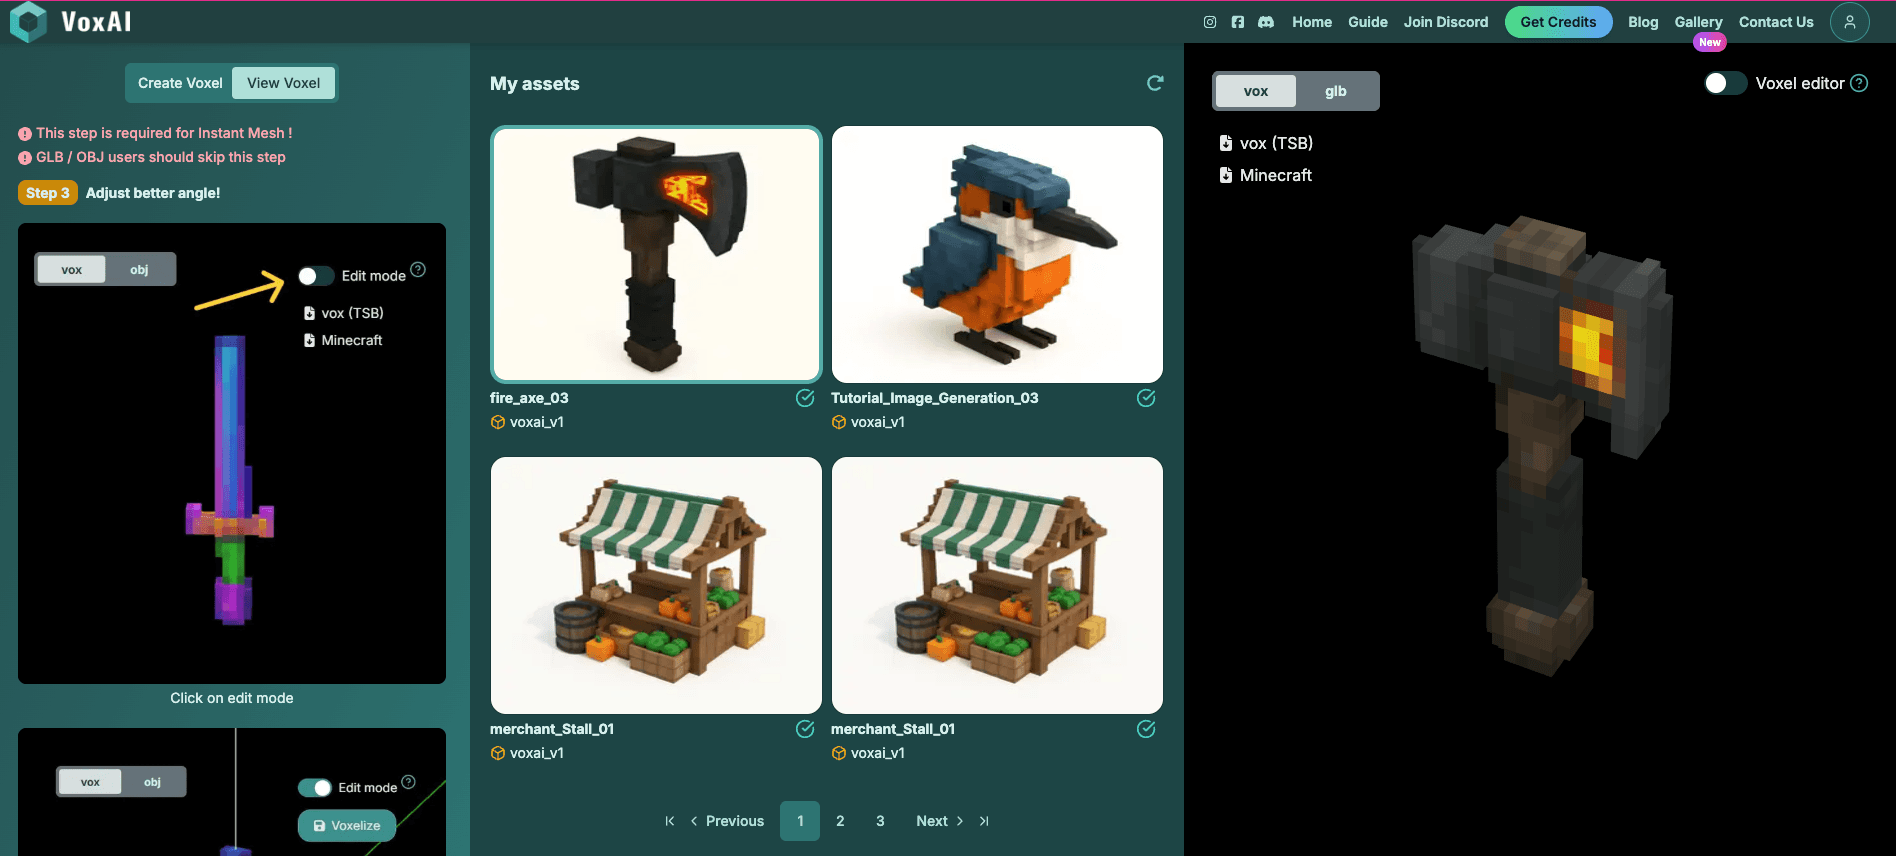
Step 5: Congratulations! 🎉
Your re-voxelized model is now optimized for Minecraft format. In View Voxel you can download .vox, .json, .glb, and converted FBX / OBJ exports—see the Export Formats guide.
Once you've finished all steps and generated your refined model, complete the tutorial to unlock full app access. You'll land in the Gallery where you can browse community creations before entering the main application.
Workflow 2: Generating from a Text Prompt
Now let's explore the alternative approach: creating assets directly from text.
Step 1: Create a New Text-to-Voxel Generation
In the Create Voxel section, select Text-to-Voxel. Give your asset a name—for this example, we'll create a weapon.
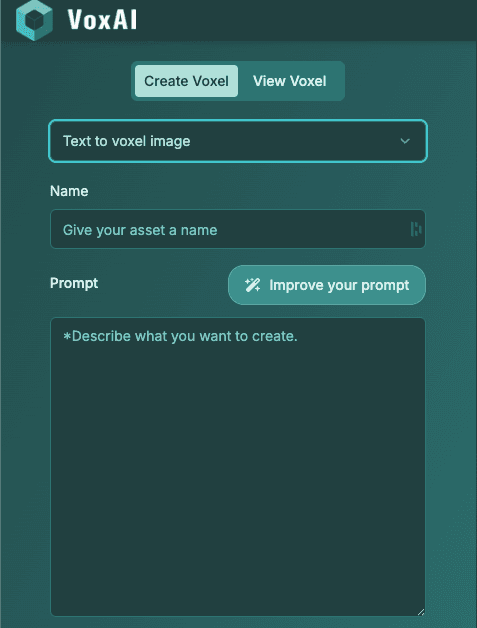
Step 2: Write and Refine Your Prompt
Enter a brief description of what you want to create. Use the "Improve Your Prompt" function to generate a more detailed, optimized prompt that produces better voxel art results.
Example Comparison:
"fire-type axe weapon" (produces less usable results)
A more elaborate, detailed description yields much better, more detailed voxel art images.

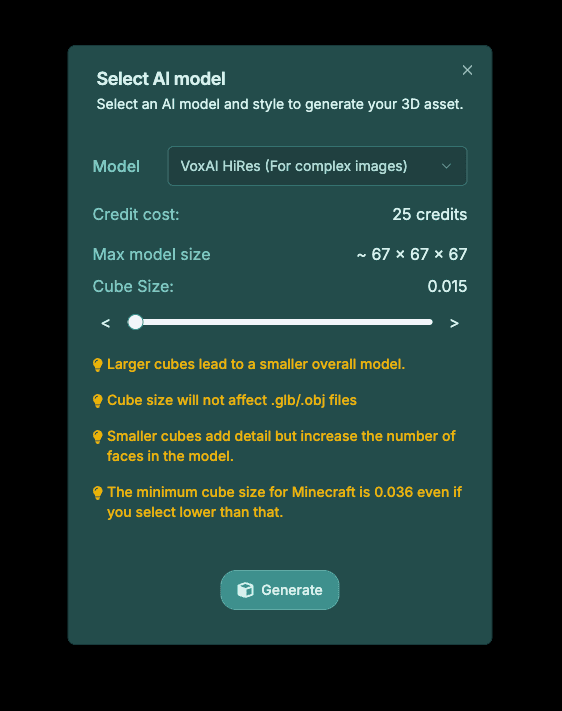
Step 3: Select Your AI Model
Choose the appropriate model for your generation. While multiple options are available:
🌟 VoxAI HiRez (Recommended)
Our best model for most use cases. Start here for optimal quality.
VoxAI Stable
Sometimes produces better results for simple images with fewer colors.
Hunyuan3D
Another powerful open-source model option that can produce decent results.
Step 4: Generate and Refine
Click generate. You can navigate to View Models to monitor progress. Your generating models appear in the list, and a green checkmark indicates completion. The interface auto-refreshes, but you can manually refresh if you experience network issues.
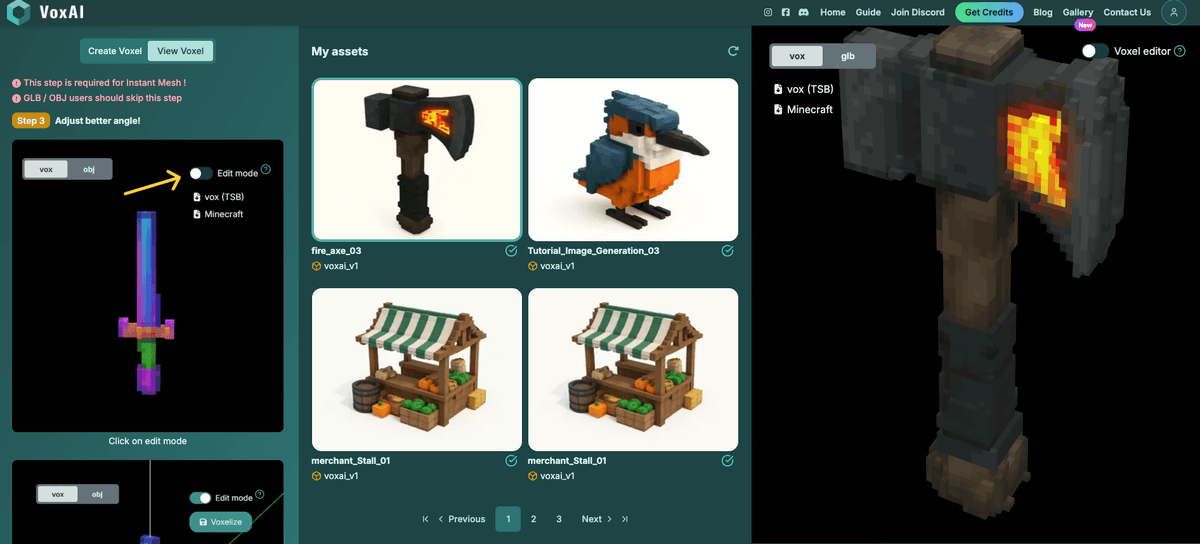
Once complete, open your model. For Minecraft items, you may want to adjust the size to make it more appropriate for gameplay. Change the cube size and click Revoxelize to create a version suitable for Minecraft that can be exported to Blockbench or other voxel editors.
⚠️ Important Note: Avoid changing the angle parameter as it can significantly affect the model's shape (unless working with specific elements like blades—covered in separate tutorials).
Understanding the Full App Interface
The main app interface centers around two primary functions:
🎨 Create Voxel
For generating new models:
- • Text-to-Voxel: Generate from text prompts
- • Image-to-Voxel Image: Generate from reference images
👁️ View Voxel
For managing existing models:
- • View individual models
- • Re-voxelize with different settings
- • Minecraft model rigging (beta)
Parallel Generation
Unlike the tutorial's linear flow, the full app allows you to:
- • Launch multiple image generations simultaneously (e.g., generate five images at once)
- • Queue multiple 3D model generations without waiting for each to complete
- • Work asynchronously: start model generations while images are still processing
Tips and Best Practices
🎯 Model Selection
Generally choose VoxAI HiRez for best results. For simpler images where you want fewer colors, VoxAI Stable may be preferable.
📏 Cube Size
Start with maximum detail (minimum cube size), then create a Minecraft-optimized version (around 0.035) as needed.
📐 Angle Parameter
Do not modify unless working with specific shapes (covered in advanced tutorials).
⚡ Batch Processing
Take advantage of parallel generation by queueing multiple tasks simultaneously.
🖼️ Image-to-3D
Subscribers unlock the ability to transform custom voxel art images directly to 3D using external tools like ChatGPT or Google Nano Banana.
Community and Credits
After completing the tutorial, you can continue experimenting with VoxAI in several ways:
Subscribe to a Plan
Choose from affordable and premium plans to access the full Gallery and generation credits.
Join Discord
Connect with the community to get free credits, learn from experienced users, and receive direct support.
Stay Involved
Active community participation provides opportunities to earn additional credits and master advanced techniques.
Thank you for following this tutorial! 🙏
We look forward to seeing your creations in Discord!